Polaroid 350

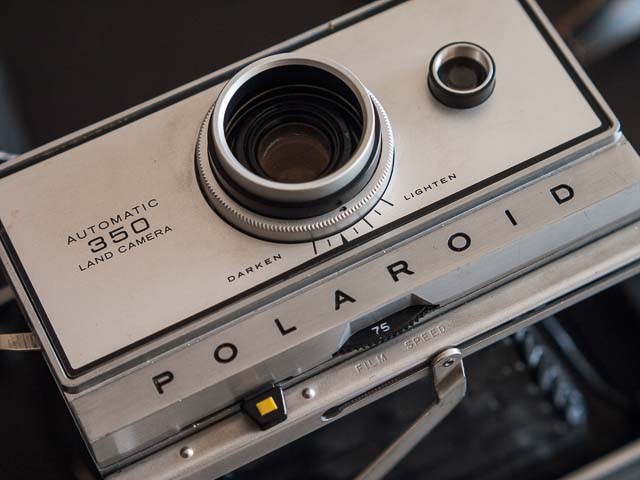
This is a Polaroid 350 model from 1969 to 1971. Along with the other ’50’ models this is one of the most desirable automatic models as it has a high quality 3 element glass lens and the superb Zeiss viewfinder with an integrated rangefinder and parallax corrected bright line frames. For the 300 series Polaroid did in fact have one model above the 350: the 360 model added an electronic flash gun with rechargeable batteries and a charger for the batteries. But the rechargeable battery pack often fails after a few years and as it cannot be easily replaced the 350 model is a more practical option these days.
Batteries are something of a problem with the 350 model too. It uses two rather odd 532 batteries that can still be bought, but they are very expensive. Fortunate it is easy to convert the 350 to take modern AAA batteries… see below for more details.
Being automatic the 350 model is much more convenient than my Polaroid 195, but it is also much less reliable, so I think that my 195 will see more action in the future, despite my initial love affair with my 350! Also, the electronic timer of the 350 uses a pressure plate to start automatically when the photograph is pulled out of the camera, and this makes the camera difficult to use with modern Fujifilm FP100c pack film.
My Polaroid 350 has was never all that reliable, and when the film door latch broke on my 195 I decided to cannibalise my 350 to get it fixed. The lovely Zeiss viewfinder is now also to be found sitting on top of the 195.
Polaroid 350 detailed photos
Here is the 350 folded and ready to take it’s plastic cover.

Like the 195, I have never seen a lens cap for the Polaroid 350. Polaroid seems to have thought the plastic covers that made for these camera made lens caps unnecessary.

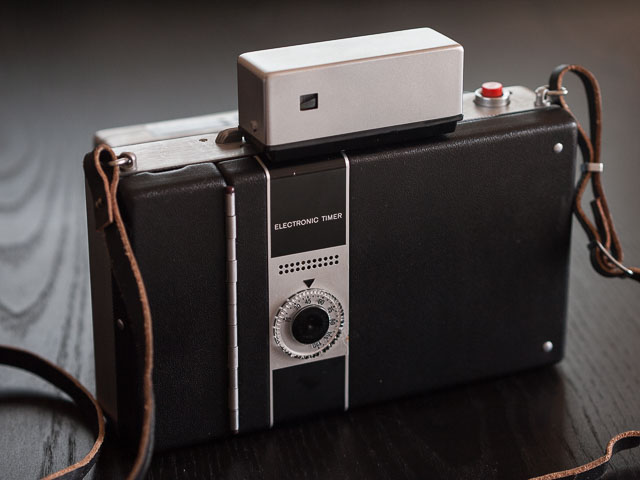
This is the back of the camera. You can see that unlike the 195, with it’s separate windows for the rangefinder and viewfinder, the 350 with its superior Zeiss integrated range/view finder, has a single window./
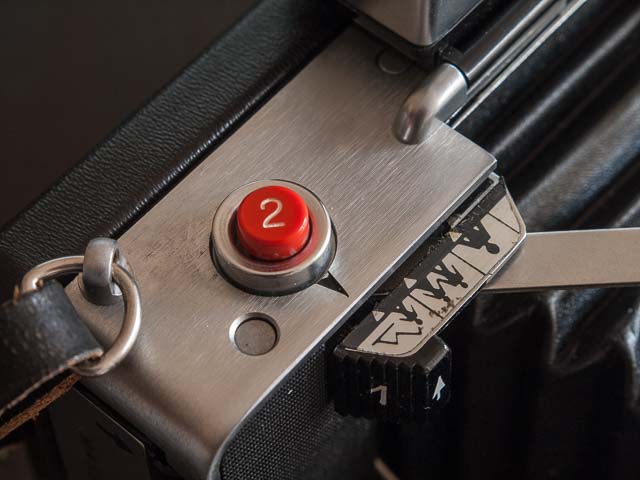
You can also see the electronic print development timer here,
#585 UV finter
This UV filter fits all the automatic type Polaroid pack-film cameras.

This is the #585 UV filer fited to the 350.
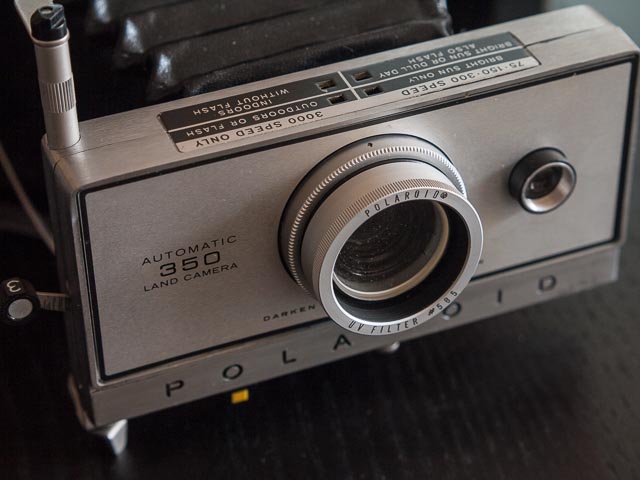
Like the 195 the 350 is focused using these tabs at the top of the camera. But unlike the 195, which has a distance scale in meters, the 350 has focusing zone symbols for those that don't want to use the rangefinder to focus.
Converting the 350 to take AAA batteries:

One of the problems with the Polaroid automatic pack-film cameras is the batteries they take. You can still buy them new (try the Small Battery Company if you want to go down that route), but they cost a packet! And if you have a pack-film camera with an electronic timer you'll need two of these little puppies!
Here you can see what these batteries look like… they're odd little things with press-stud fasteners.
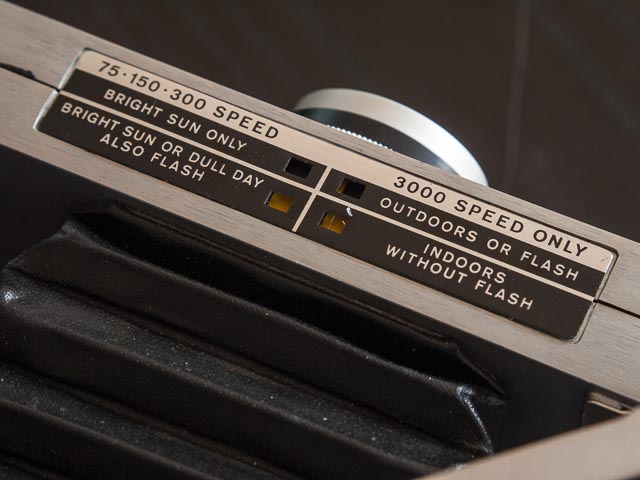
Fortunately performing open battery compartment surgery on your pack-film camera to convert it to take modern batteries is a much more trivial task than it sounds! Since my camera takes 3v 532 batteries this is the kind of camera I'm going to talk about. The following models take one 3v battery: 103, 104, 125, 135, 210, 215, 315, 320, 330, 420, 430, 440, M60, and Countdown 70. And these cameras have electronic timers and so need two batteries: 335, 350, 360, 450, M80, and Countdown 90. The camera I'm talking about here is a 350 and so it takes 2 batteries.
You have two main choices: You can either convert your camera to use 3v CR123 lithium batteries, or you can convert to normal 1.5v AAA batteries. The advantage of the former is that you can fit 2 3v batteries into the 350 battery compartment so you can power both the shutter and the timer. The disadvantage is that CR123 battery holders aren't easy to get hold of. You can just use the existing 532 batter holder already in your camera and just use electrical tap to connect the bare ends of the wires to the batteries if you don't mind peeling the tape off each time you change batteries.
Another option is to use AAA batteries. The advantage here is that AAA battery holders are easy and cheap to buy from the internet (I got mine from REUK). The disadvantage is that you will only get one AAA battery holder in the 350 battery compartment which holds 2 1.5v batteries. This means you can only power the exposure system and not the timer, but that's not such a bad thing… just use your watch to time film development! This is the option I'll be covering here, though I may well convert to CR123 batteries later.
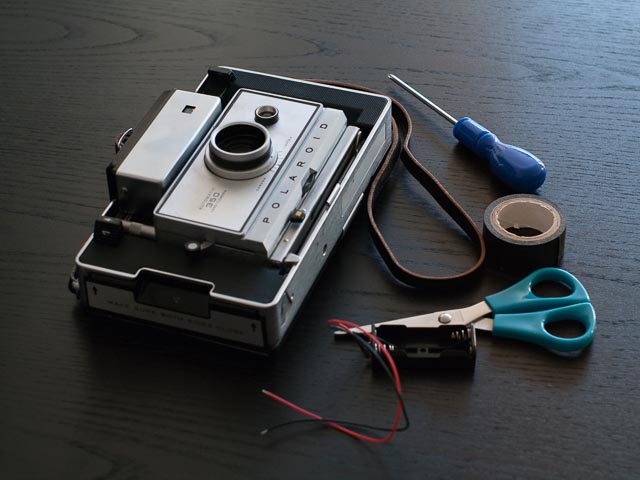
Here you can see all the tools you'll need… this is definitely the low tech approach! Everything apart from the AAA battery holder was just stuff already lying around the house. So here's the list:
- Polaroid 350 camera (duh!)
- Small Philips screw driver
- Pair of scissors (if you have wire strippers even better, but you can get by with ordinary household scissors)
- Electrical tape
- AAA battery holder
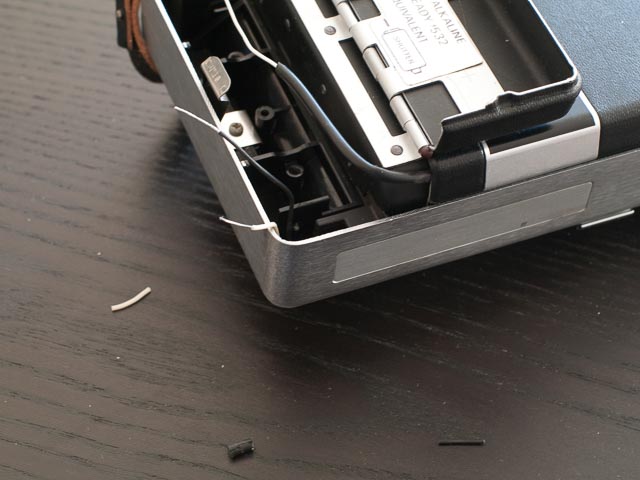
The first step is to remove the existing battery holder. This is just a matter of unscrewing the two Philips screws you can see in this photograph. When you have unscrewed the screws just snip the wires where they attach to the battery holder. I left about 1-1.5cm of wire on the battery holder so I could easily re-install the old 532 battery holder if necessary (so keep the screws and battery holder safe!)

The next step is to strip the plastic coating off the ends of the wires that come into the bottom of the container. These are the wires that take power to the shutter/exposure mechanism. The wires that come in bound together at the top of the battery compartment are for the timer. Since we won't be powering the timer you don't need to do anything to these wires. You will also need to strip the ends of the wires on the new AAA battery holder.
Now just bind the ends of the wires together. The black wire on the new battery holder goes with the black wire in the camera and the red wire on the battery holder goes with the white wire in the camera.
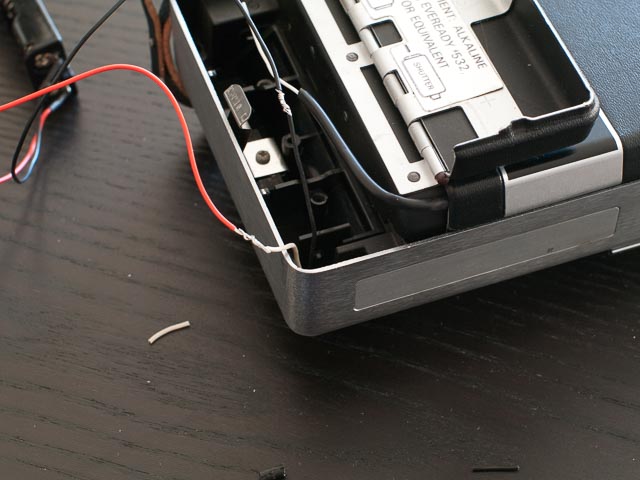
You then need to tape up the joins with electrical tape to ensure the bare wire is safely insulated.
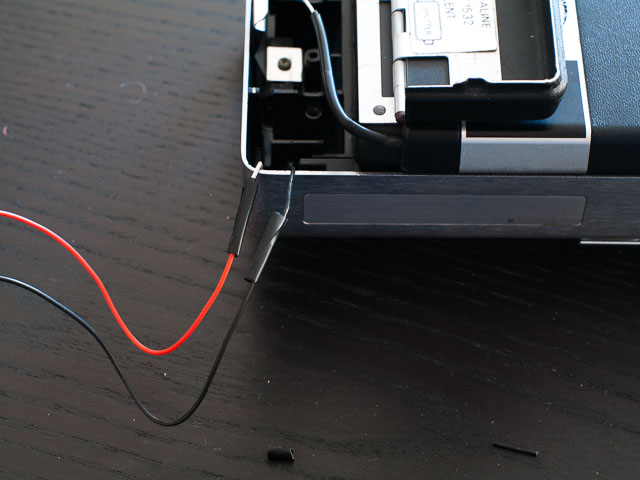
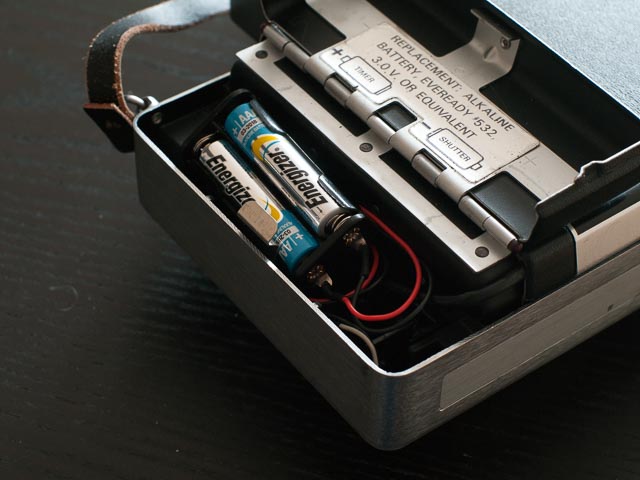
You then just need to put the new battery holder in the battery compartment with the wires wound up neatly underneath. You will need to experiment with slightly different positions for the battery holder until the battery compartment lid closes properly.
Job done!
To make sure your conversion has worked just open the camera, cock the shutter, and then press the shutter button while pointing the camera at a dark scene. The shutter should stay open for a long time (make sure you keep your finger on the shutter button until the exposure is finished). Then repeat while pointing the camera at a bight light source. The shutter speed should be much shorter.
Photographs taken with the Polaroid 350
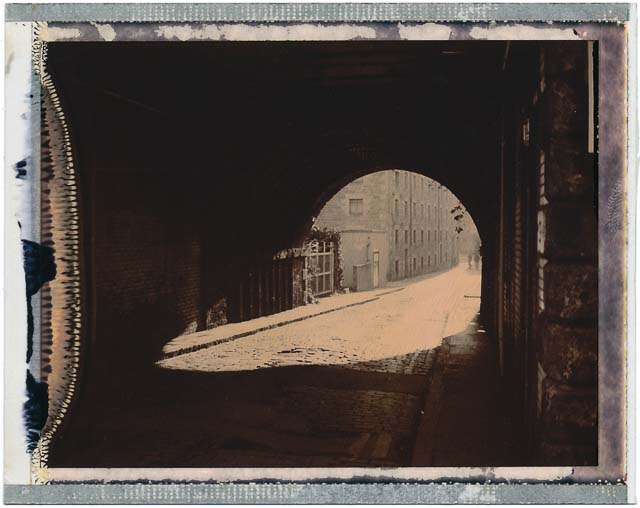
Film: Polaroid 100 Chocolate
Location: Holyrood Park, Edinburgh
This image uses a technique I call ‘back peeling’ which leave the goopy frame on the print which normally gets peeled off with the negative to leave a clean white frame.
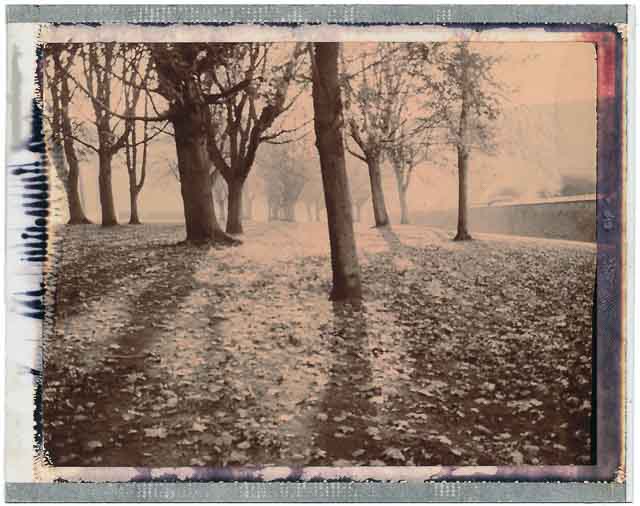
Film: Polaroid 100 Chocolate
Location: Croft-An-Righ, Edinburgh
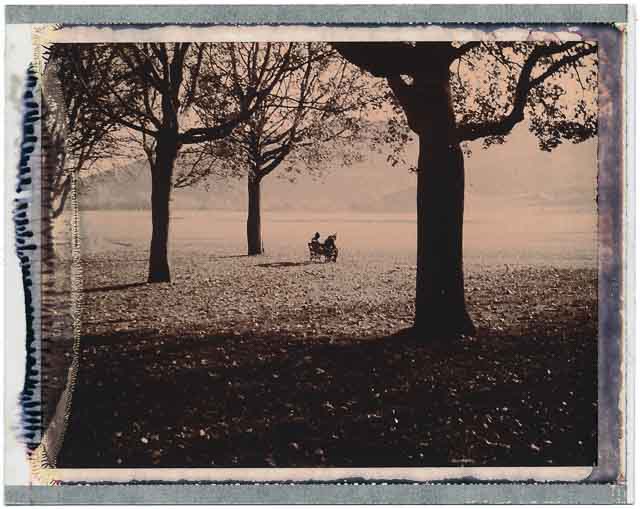
Film: Polaroid 100 Chocolate
Location: Holyrood Park, Edinburgh
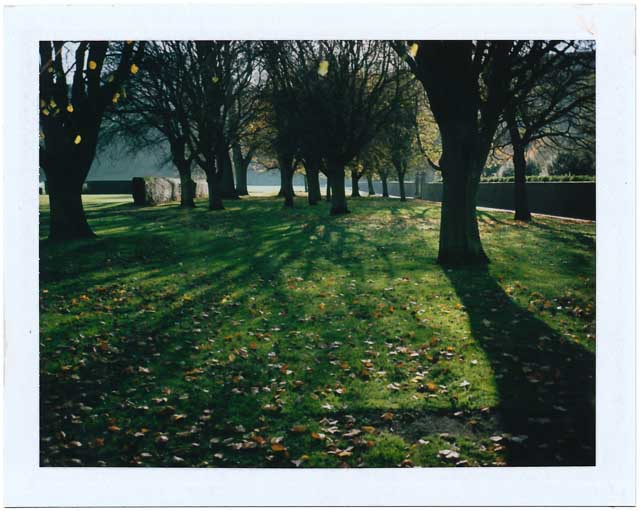
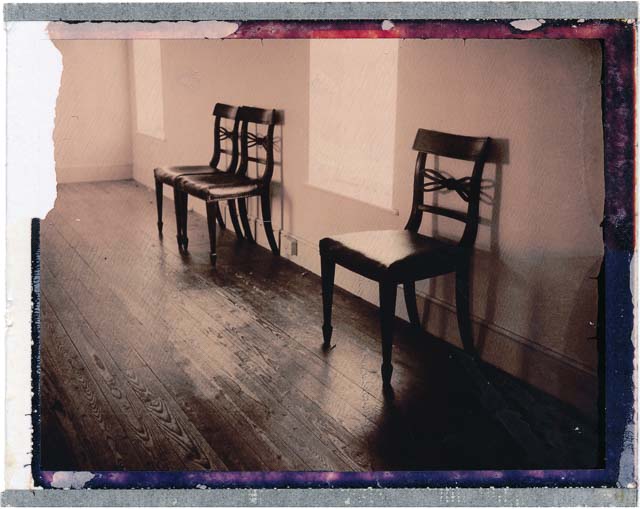
Film: Polaroid 100 Chocolate
Location: Skaill House, West Mainland, Orkney Islands
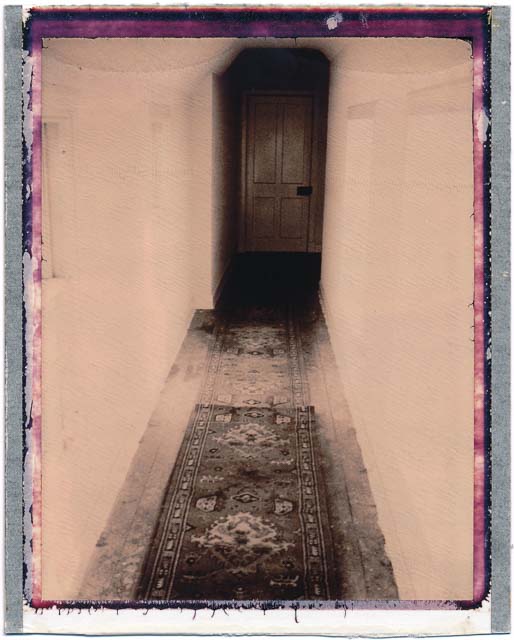
Film: Polaroid 100 Chocolate
Location: Skaill House, West Mainland, Orkney Islands
Film: Fujifilm FP100c
Location: Holyrood Park, Edinburgh