Bell & Howell 51mm f/1.2

Bell & Howell 51mm f/1.2 lens unmounted

Bell & Howell 51mm f/1.2 adapted and ready to use on Sony E mount

Bell & Howell 51mm f/1.2 mounted on a Sony A7 II camera
The lens being adapter here is a Bell & Howell 2 inch/51mm f/1.2 lens from a 16mm cine projector, manufactured in Japan. Just like my other 16mm cine projector lens, the LOMO PO 109-1A 50mm f/1.2, this lens produces some crazy results. But unlike the Soviet lens, I couldn't work out a way to convert this lens in a way that enabled it to focus to infinity, or indeed anything close to infinity. But that doesn't really matter, because like the PO 109-1A this is a lens that really comes into it's own at close focussing distances anyway. This is a lens I pull out of the cupboard when I want to create soft, painterly, semi-abstract studies of plants.
Here is everything I used to adapt this lens:
-
 A focusing helicoid designed to mount an M52 screw mount lens on an M42 screw mount camera with a extension range of 17-31mm.
 Even with a focussing helicoid that is much shorter than those I use for other lenses, the Bell & Howell lens won't focusing on anything more than about 80-90cm away. But like I said, that's OK… it can still produce beautiful abstract close-ups.
-
 Black Tack
I recently discovered Black Tack as an alternative to Blu Tack. It's more expensive that Blu Tack, but it's much stickier, and of course it's black, so it is less visible once you've built your lens. If you've got some Blu Tack lying around, then that will work too, but it's going to be a bit more visible. Here you can see where I needed to put the black tack on the lens.
-
 Slim M42 to Sony E adapter.
This slim M42 to Sony E adapter is designed specifically for attaching focusing helicoids to Sony mirrorless cameras. That link is to a search on eBay. You can modify the search term to find similar adapters for other cameras. I paid £5.99 for mine.
Method
This lens is much larger that my other 16mm cine lens (the LOMO PO 109-1A 50mm f/1.2), hense the need for an M52 Helicoid rather than the smaller M42 helicoid I used for that lens. This means that the lens doesn't really fit into the Helicoid but rather it sits on it. But because the black tack I used to fix the lens in place is much stickier than normal Blu Tack, it seems to stay in place fairly well. But this is a case where I really wouldn't be happy with Blu Tack as an alternative to Black Tack. Even with Black Tack I feel the lens needs to be used with some care.
But having said that, the method for building this lens is still very simple: just put a ring of Black Tack around the projector lens where it will sit on the focusing helicoid to hold it in place. Place the projector lens in the focussing helicoid, then screw the focusing helicoid into an ultra-slim Sony E mount adapter. And your lens is complete… just mount it to your camera like you would any other lens! (See General notes on using adapted lenses if your camera tells you that you have no lens attached.)
You can use your camera's manual focusing aids to focus just like with any other manual focus lens.
Notes on using your adapted projector lens
Your new lens is going to produce some pretty funky results that will be quite different to what you may be used to with a purpose built camera lens. The first thing to bear in mind is that this lens won't focus further away than about 80-90cms.
The second thing to bear in mind is that the 16mm movie frames this lens is designed to project are just 10.26x7.49mm (or 12.52x7.41mm for Super 16mm). But despite that this lens will cover full-frame, albeit with some very heavy vingetting. However I found that this vignetting can almost enitrely be dealt with using the vignetting correction tools in Adobe Lightroom with no cropping at all. Here is an example:

This is the first image from the gallery below, but shown as it looked straight out of camera. The final version in the gallery is not cropped at all… I've just used Adobe Lightroom's built-ing vignetting correction tools.
Examples
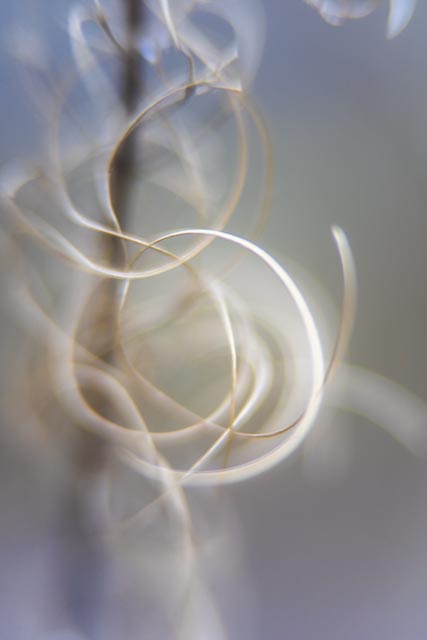
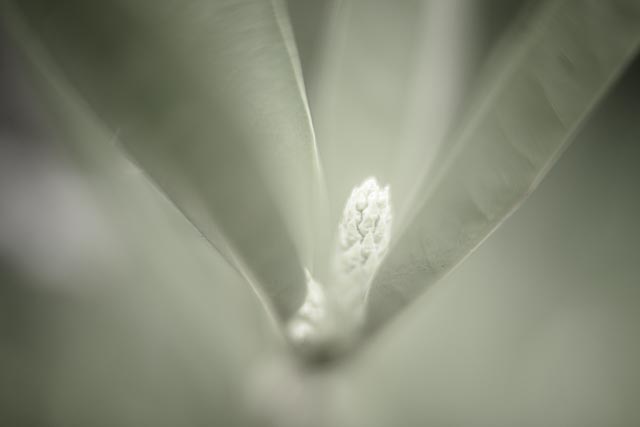
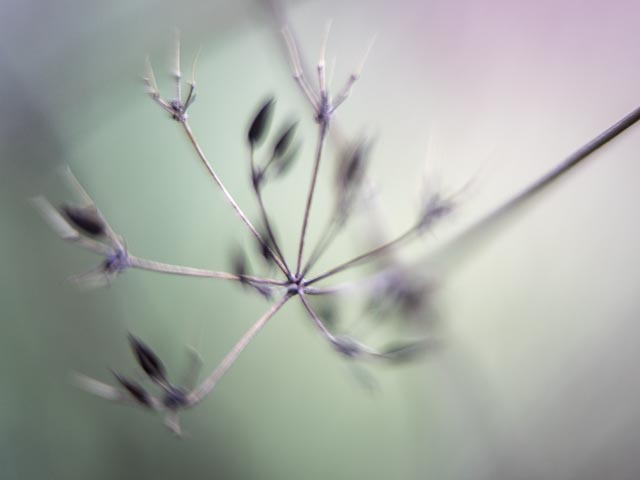
So with all these problems why would anyone be bothered with a lens like this?! Well, using a lens like this certainly isn't isn't about how lines per millimetre you can resolve (answer: not very many!!) It's about using a lens that can render a scene in a totally unique way, and when that style is inline with your artistic intentions I think this lens can produce results that are well worth all the effort. But in the end you can only judge these things for yourself! Which brings us to…
This images were all processed in Adobe Lightroom with a variety of colour treatments mainly using different colour profiles in the 'basic' tool panel.