Helios 44-2 with front element reversed

 Jump straight to the sample photographs if you just want to see some pictures!
The Helios 44 lens has become something of a cult object in vintage lens circles in recent years. The lens was made over a long 40 year period with many different version, but my personal favourite is the early Helios 44-2, not least because it's easy to modify in a variety of ways to produce unique results.
One such modification is the Helios lensbaby modification I've written about else where on this site, and another is the subject of this article: reverse the front lens element for some amazing bokeh effects. Sounds interesting? Read on…!
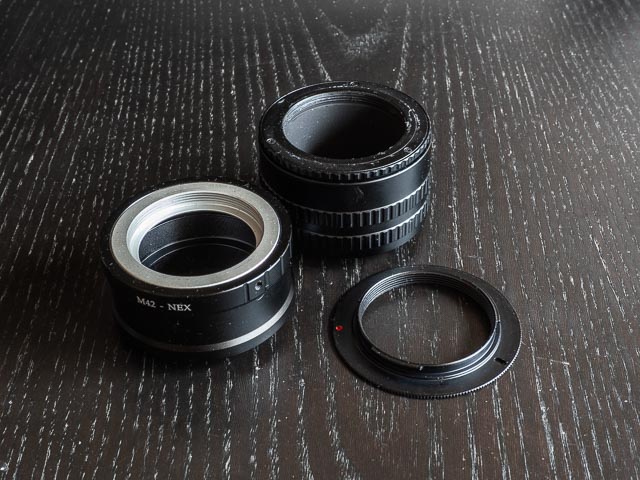
Ingredients
-
Helios 44-2 lens
 I've read about people doing this mod to other versions of the Helios 44 lens, but since my only personal experience is with the Helios 44-2 lens I'm going to stick with recommending this specific version.
Unfortunately, as these lenses have have increased in popularity, so have their prices. You sometimes see them on eBay with buy-it-now prices of £70 or more. But if you're patient, you can pick them up in auctions for much less. £30 is not unreasonable, and I managed to pick up this example in 2020 for £18 including post and packing.
-
A lens wrench
 You'll use this lens wrench to partially dismantle your lens. These things can be found easily on eBay and aren't very expensive. I paid £10 for mine.
 -
An adapter of some kind to mount your lens to your digital camera
 If you don't already have an M42 adapter for your camera's lens mount, you'll have to factor that into your budget. Standard M42 adapters are available for pretty much every mirrorless camera (and some DLSRs too), and can be found cheaply on either Amazon or eBay. I paid £5 for one direct from an independent manufacturer in China via eBay, but it took 2 or 3 months to arrive! If you want to be cautious and get one from a U.K. supplier expect to pay a more. The least I've paid from a U.K supplier on eBay is £13.
But as you'll see below, I wasn't very happy with the results of my modified Helios 44-2 lens at longer focusing distances. Instead I was much happier using my modified lens at close distances, so I would recommend something that will allow macro focusing. I used an M42 36-90mm focusing helicoid combined with a slim M42 to Sony E mount adapter. The former cost me £20 on eBay while the latter cost £6, also on eBay.
So because I already had all the other ingredients, my budget was just £10 for the lens wrench. Your total budget will vary, depending on how much you paid for the Helios 44-2 lens and whether you decide to go for a standard M42 adapter, or a focusing helicoid combined with a slim M42 adapter. So that could be anything from as little as £34 to as much as £80.
Method
I normally try to give full instructions for completing my projects, but I found the process of partially dismantling my lens rather stressful, so I wasn't able to take photographs while I was doing it, much less make a video (which would have been full of swearing if I had LOL) So instead I'm going to direct you to the video I used on YouTube on the Simon's utak channel, and then provide a few additional comments of my own.
The first thing this video says is that this process is easy, but if, like me, you've never dismantled a lens before, I strongly suspect you'll disagree! I certainly found it tricky and stressful and I would recommend performing this operation for the first time on a lens you've managed to pick up cheaply, perhaps one in not so good cosmetic condition that you don't mind adding a few new scratches to! But having said all that, if a numpty like me can do it (albeit with a fair amount of swearing!) so can anyone.
The first thing you have to do is remove the lens's name ring. The problem here is that this video really doesn't explain how to get the lens wrench to sit firmly in the name ring so it doesn't slide about and scratch the name ring (and, if you're not careful, the lens itself!). It turns out there is a notch on the name ring between the '44-2' text and the serial number, and another one on the other side near the word 'Helios'. But these notches were not easy to find, and for me the one near the word 'Helios' didn't become apparent until after I had fully unscrewed the name ring. I somehow manage to unscrew the name ring using just one notch (I'm not really sure how!), but not without leaving plenty of scratches on it (some of which you can see in the photo above). Fortunately I managed to avoid scratching the lens itself… phew!
Secondly, once I had put my lens back together with the front element reversed, the lens element was loose and rattled… a lot! The video mentions nothing of this, so I assume it isn't supposed to rattle! But even with the rattling front element I was able to capture some photos I was very happy with, so it turned out not to be a big problem.
Using your modified lens
So the big question is what kind of images will your lens produce after performing this modification? You will get a kind of extreme 'soft focus' effect with plenty of 'glow' around everything. It's a bit like a 1970s boudoir photography effect. Associated with this is a huge reduction in contrast levels. And finally you will get a big drop in sharpness… basically even when you nail the focus, nothing is ever really sharp.
This lack of sharp focus makes focusing accurately quite a challenge. Using my camera's focus peaking feature helped, but as the modified 44-2 renders little truly sharp there is very little for the focus peaking to highlight. But you will see very small specks of red (or whatever focus peaking highlight colour you use) which can give some idea of what will be in focus.
This all sounds awful, doesn't it? Why on earth would anyone do this?!
Well, it's all about the bokeh, gentle reader. (Bokeh is a word of Japanese origin that refers to the out of focus portions of the image, just in case you were wondering!) This modification will do extraordinary things to the bokeh! So weird in fact that it's difficult to describe… which is where the sample photographs below come in!
The real magic starts to happen at macro focusing distances, which is why I would recommend the M42 36-90mm focusing helicoid (combined with a slim M42 to Sony E mount adapter) instead of a normal M42 adapter. This allows focussing to very close distances indeed, at the expense of focusing on anything more than about 1 meter away. But given that I didn't really like the results at longer focusing distances I wasn't concerned by this!
There really are a pretty limited number of situations that provide really interesting results: you need to be close to your subject, with a background that is a reasonably large distance behind the subject and with a good degree of detail in it. Some nice dappled lighting also helps. For all these reasons subjects in natural woodlands are perhaps most likely to give satisfying images.
The modified Helio 44-2 lens certainly isn't a general purpose lens!!
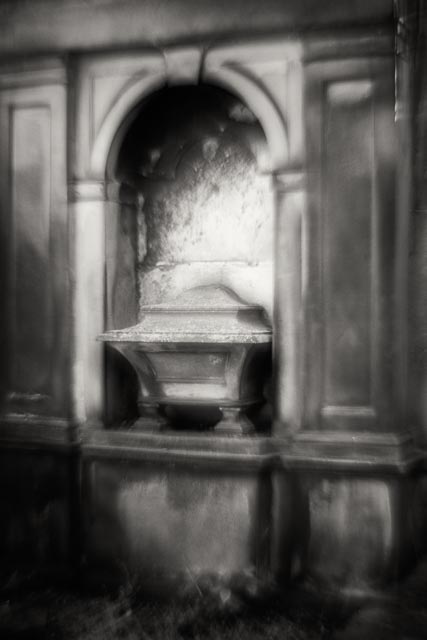
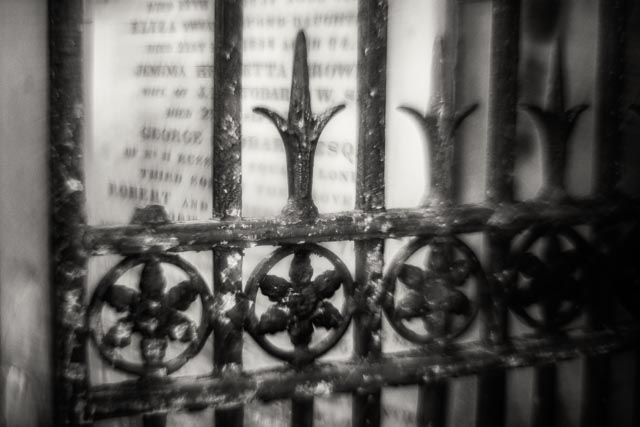
Sample photographs (close-up)
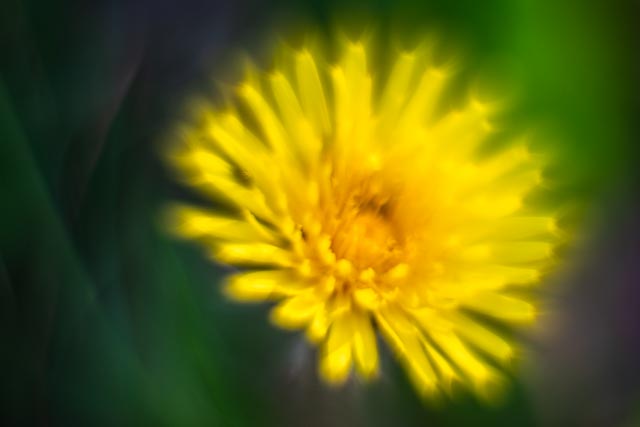
So finally we get to some photographs! Let's start with some images in ideal conditions as noted above, i.e. close-up, which interestingly textured backgrounds, and nice dappled lighting.
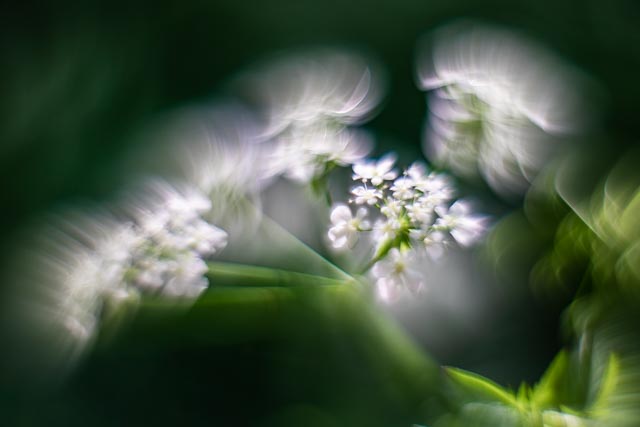
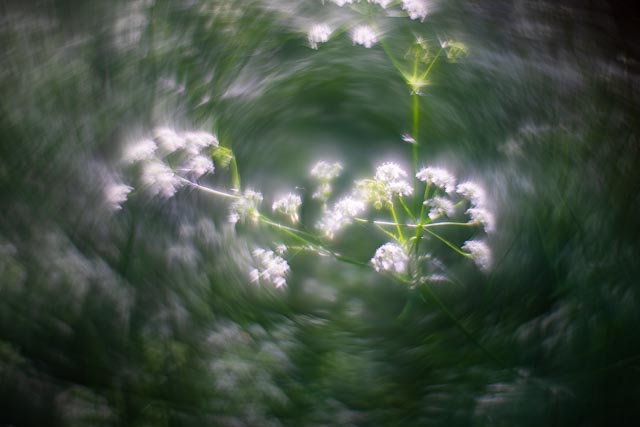

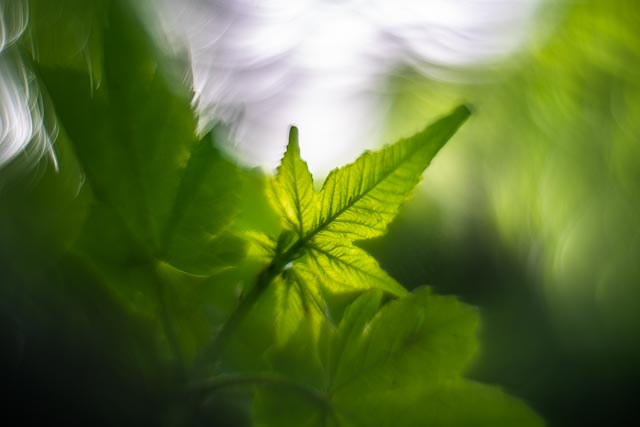
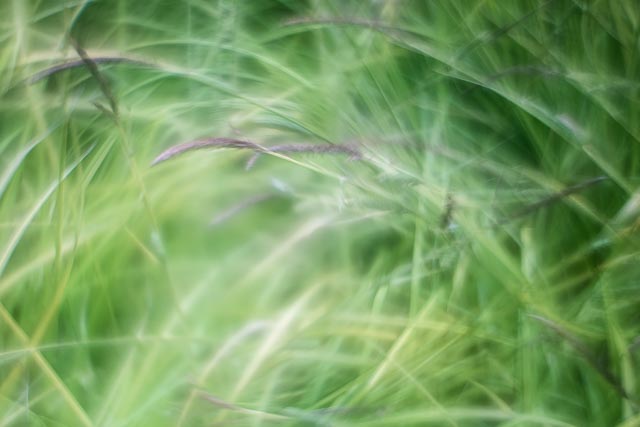
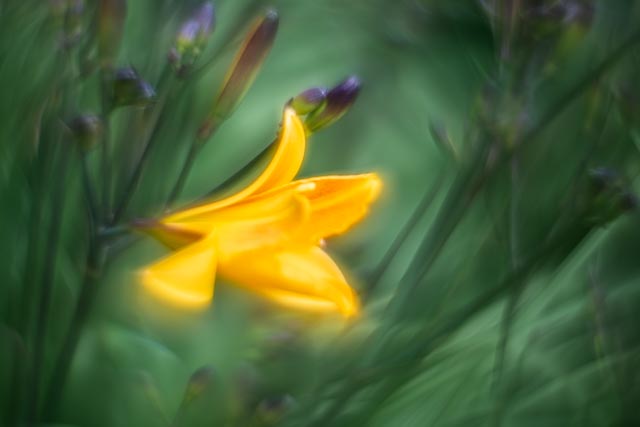


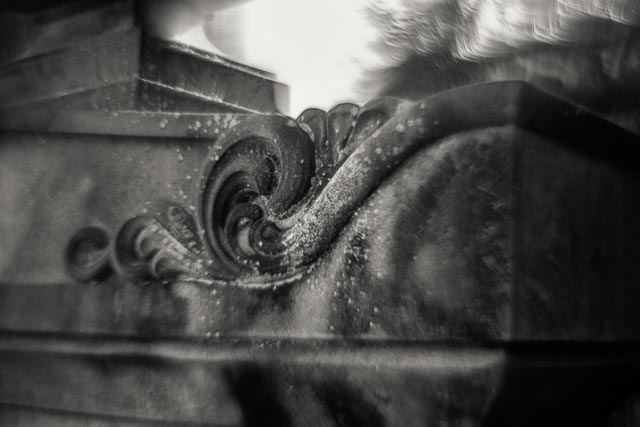
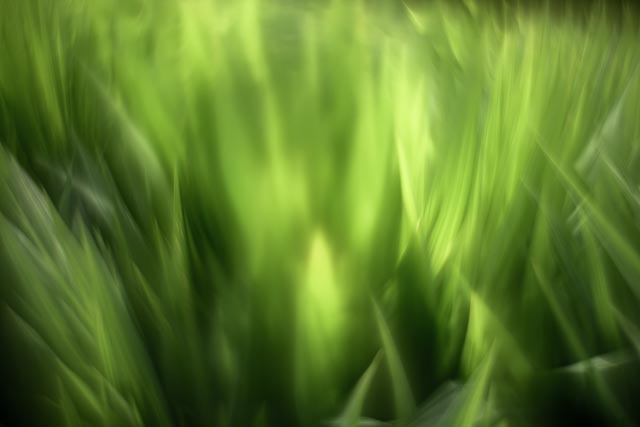
In fact, I started to become so intrigued (or in fact addicted!) by the bokeh at these close focusing distances, that I started experimenting with de-focusing the image entirely. Here you can see two pairs of images, one focused accurately (or as near as I could manage it!), and one completely defocused. As you focus through the point of sharpest focus and beyond the shapes in the bokeh change. Go too far and everything colapses into smooth and featureless blur, but at a certain point you get these really beautiful and fascinating shapes!


Here are some more completely defocussed examples:


Sample photographs (further focus distances)
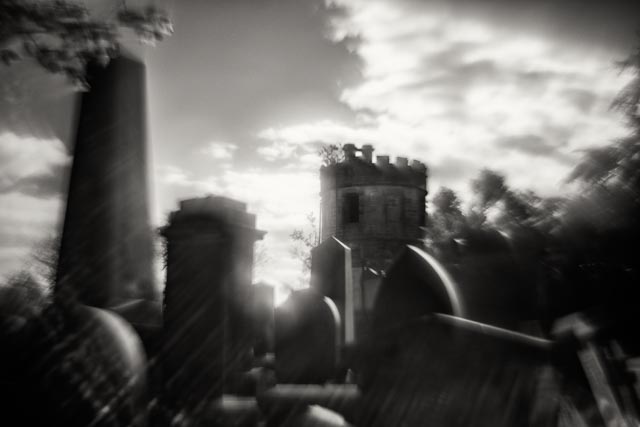
After loving the close-up results so much, I found that I was much less happy with the effects at longer focusing distances, particularly at or near infinity. Below are some of the best examples I could come up with (converted to black and white using Silver Efex Pro 2). But the only ones in this set I'm in any way happy with are at somewhat close focusing distances. The location for these photographs is Calton New Burial Ground in Edinburgh.