Infrared photography with the Sony Cyber-shot DSC-F828
Contents
- What is infrared photography?
- Infrared photography with a Sony digicam using the 'magnet hack'
- Using an R72 filter
- R72 gallery
- Using IR chrome filter
- IR Chrome gallery
- Conclusion
What is infrared photography?

 Infrared light is light with a wavelength beyond the red end of the range of colours in visible light. It's invisible to human vision, but it can have a pretty nasty effect on the results from digital cameras, so pretty much every digital camera ever made has a so-called 'IR-cut' filter permanently positioned over the sensor inside the camera to filter out this infrared light. Because who wants nasty old infrared light spoiling their photographs, right? Well, it turns out lots of people do! Infrared is whole genre of photography about which whole books have been written!
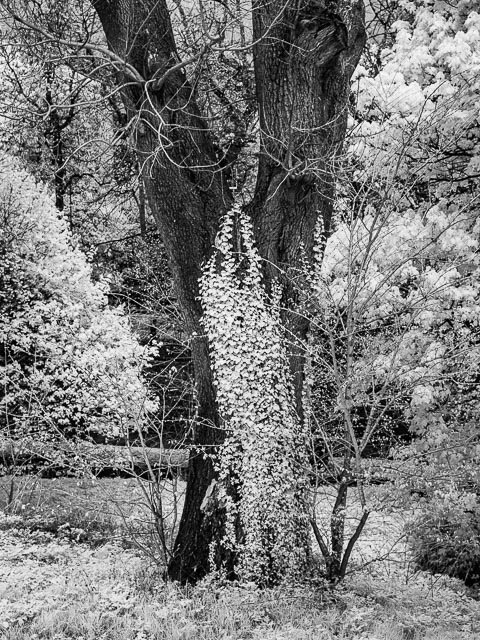
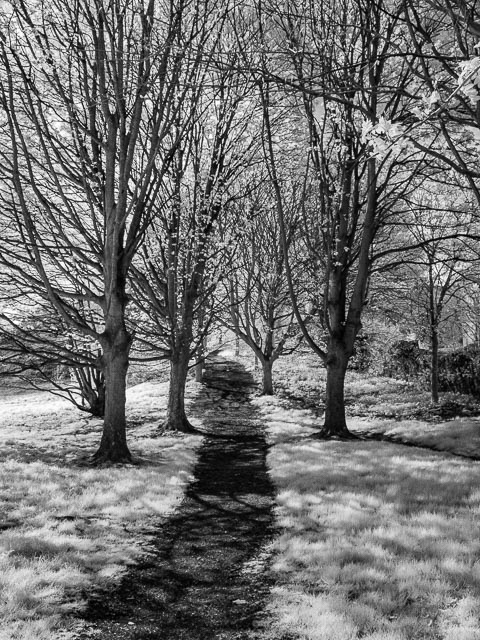
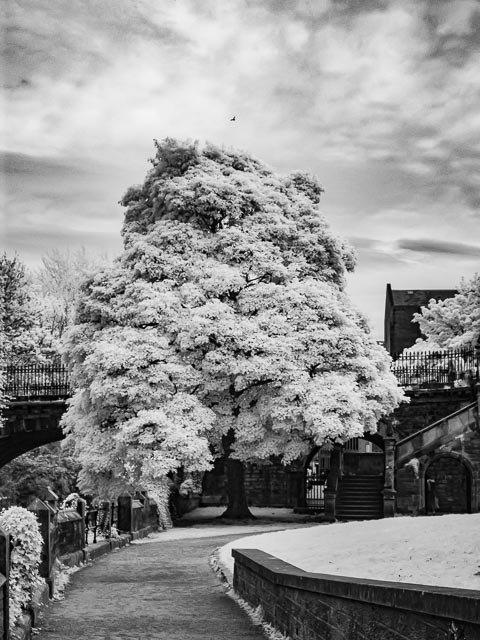
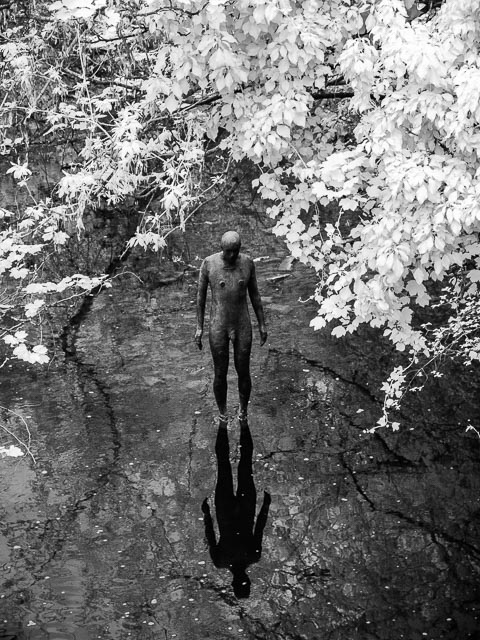
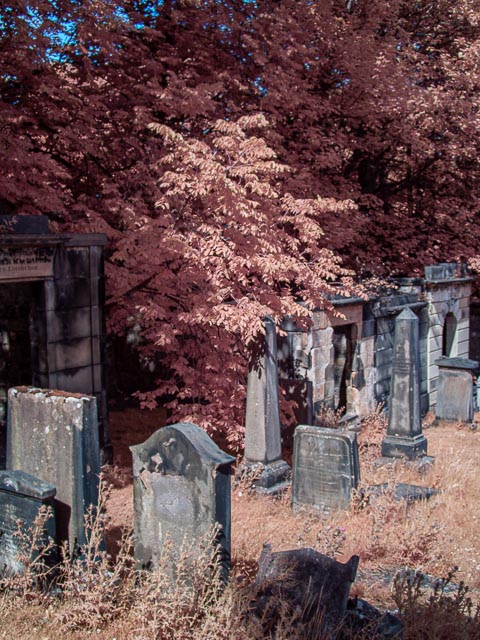
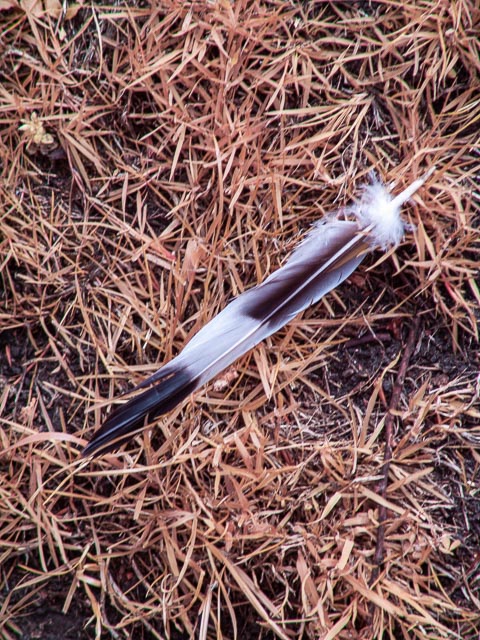
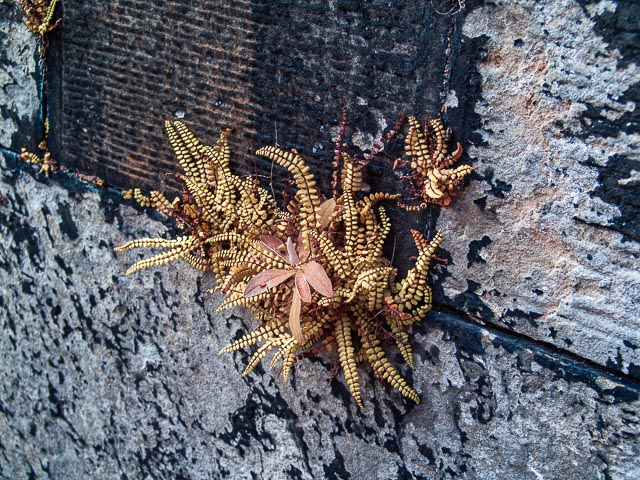
People will spend a great deal of money to permanently convert their digital cameras for infrared photography. But vintage Sony digital cameras from the early to mid 2000s offer a way to experiment with infrared photography on a budget. Before I go into details, let's take a look at a couple of examples of infrared photograph taken using a Sony Cyber-shot DSC-F828 camera from 2003. The black and white photograph was taken using a standard R72 infrared filter. Notice how the leaves and grass, which reflect a lot of infrared light, appear to glow white. And because blue sky emits very little infrared light it comes our very dark. The colour photography was taken with an IR Chrome filter. Notice how this time the sky looks normal, but the leaves and grass this time are a bright orange colour.
Infrared photography with a Sony digicam using the 'magnet hack'
In the early to mid 2000s one of Sony's unique features on many of their mid to high-end digicams was something they called 'Nightshot' mode. In cameras with this mode the IR-cut filter that normally protects the sensor from IR light is temporarily swung away from the sensor to allow photography in night-time conditions using an IR light emiter on the front of the camera. Nightshot mode also sets a whole lot of other settings which give photographs a green 'blair witch project' look. Very atmospheric in it's place, but this renders Nightshot mode pretty ineffective for creative daylight infrared photography. So why am I even taking about this?!
But it turns out that the IR-cut filter on Sony Nightshot cameras is moved away from the sensor using magnets, and you can force that to happen without activating Nightshot mode simply by moving a magent near to a particular spot on the camera body. The great thing is that this is a temporary effect that doesn't harm the camera in anyway. You can easily move the IR-cut filter back into place simply by turning the camera off and then on again. This is often referred to on the internet as the 'Sony infrared magnet hack', and if you've ever fancied experimenting with infrared photography without spending £100s or £1000s this is perhaps your best chance!
Now in theory the Sony infrared magnet hack works on any Sony camera with Nightshot mode, but in practice it's a bit more complicated than that. On some Sony Nightshot cameras have a lot of difficulty on focussing on anything more than a couple of metres away. But I can confirm that it works perfectly on the F828 at any focus distance… yay! And here's how:
 The first thing to do is put an IR filter on your lens to filter out most visible light. I used a standard R72 Infrared filter which I bought for about £18 on Amazon (but note that this was quite a cheap filter with a plastic filter thread… if you don't mind doubling your budget you can get a better quality one with a more durable metal filter thread).
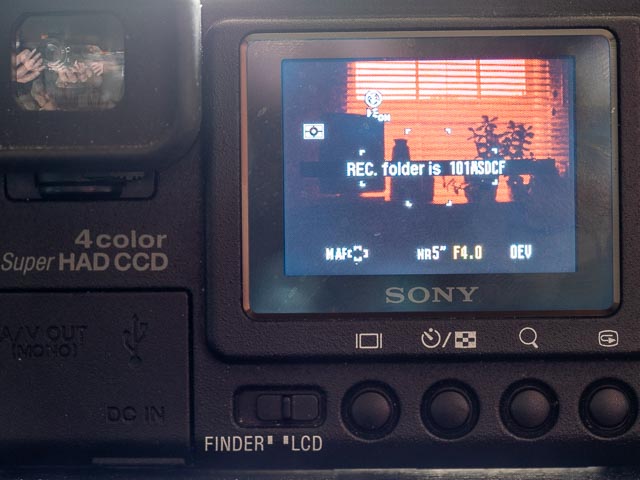
Now, at this point the IR-cut filter is still in place cutting out most infrared light from hitting the sensor, and the R72 filter you've just put over the lens is cutting out most infrared light, so very little light of any wavelength is hitting the sensor at all. So even though I point the camera at a fairly bright window, the shutter speed selected by the camera is a full 5 seconds! So let's move that IR cut filter out of the way:
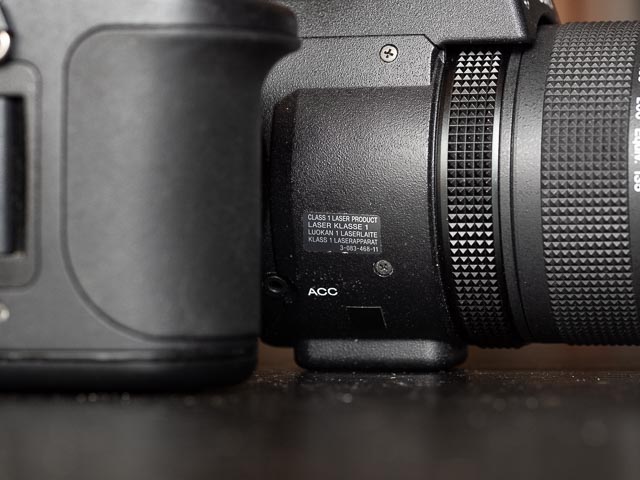 The place on the camera you're looking for is to the right and just below the accessory port on the side of the lens barrel (it's labeled with the letters 'ACC'). I've put a small and discreet square of black electrical tape to remind myself of the location each time I want to do this trick. So all you have to do is move the end of your magnet (I got these Neodymium Bar Magnets, again from Amazon) over this point on the camera. You'll hear a soft click when the IR-cut filter swings away from the sensor. Note that you'll have to experiment with which end and side of the magnet has the right polarity to move the IR-cut filter. It took me quite a while to get this right, so don't give up. Once I had found the right end and side of the magnet I again used black electrical tape on the magnet to make it easy to find again.
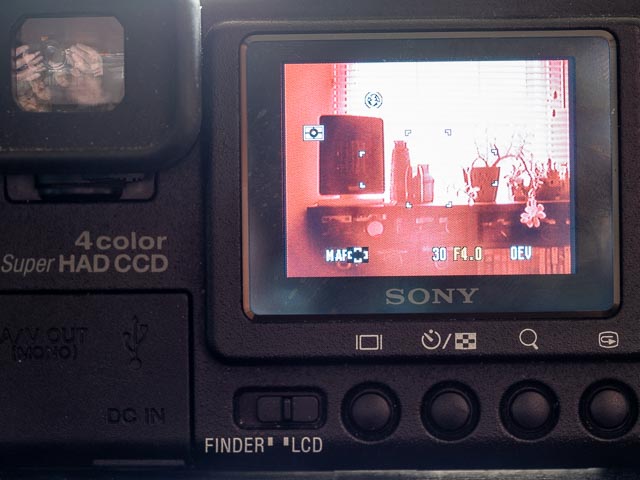 When you've heard that soft click it's time to look at the camera's monitor again. You should see that the view has brightened considerably. In my case, the shutter speed selected by the camera went from 5 second to 1/30th of a second! While you're learning this technique you'll want to do it in a nice quiet room at home because that click when the IR-cut filter moves out of the way of the sensor is very quiet. Once your confident you can perform this trick without hearing the click (because of, let's say, traffic noise, if you're close to a road) it's time to go out into the field and try out some infrared photography!
Using an R72 filter
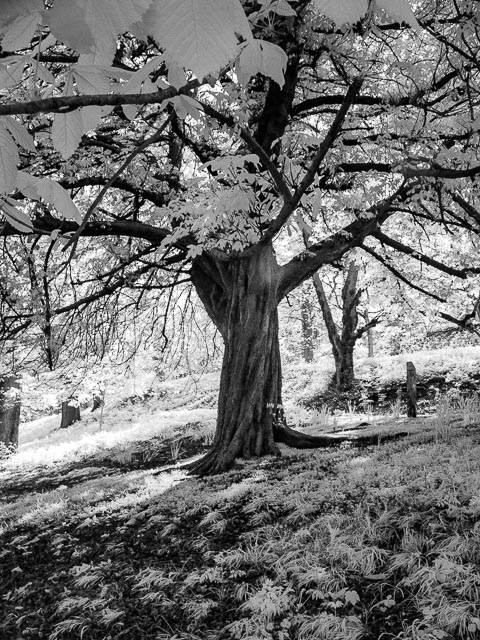
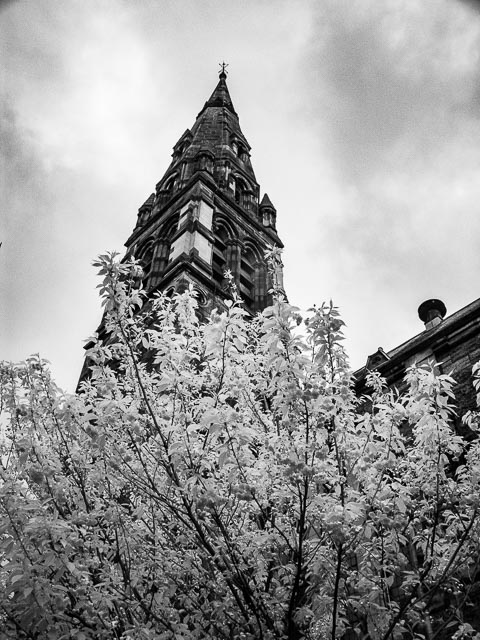
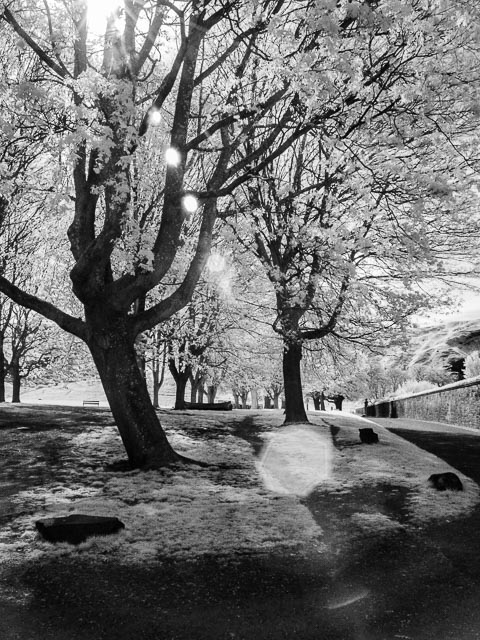
An R72 filter is the most common kind of infrared filter originally designed to work with b&w infrared film. It blocks out most (but not quite all) visible light, so it appears to be a very, very dark grey. This makes it very difficult to use on an SLR camera as you can't see though it very well. But on a digital camera with an electronic viewfinder that has had it's IR-Cut filter removed, the viewfinder works perfectly! Processing black and white infrared photographs shot using an R72 filter is probably simpler than processing other styles of infrared photograph. So, being a beginner myself, this is where I started!
I found that my Sony F828 worked perfectly with the infrared magnet hack when using a standard R72 infrared filter. Focusing was accurate and reliable at all focussing distances and even with the ISO set to 64 I was getting perfectly hand-holdable shutter speeds in somewhat overcast conditions (just as well since the F828 doesn't have image stabilisation). The pink-toned images you see in the viewfinder wasn't a problem. In fact it serves as a useful reminder that you're shooting in infrared light. And some of the classic infrared effects, like bright white vegetation, twas visible in the viewfinder as I worked.
I set camera set to record in RAW format for maximum flexibility when processing the photographe later. Just bear in mind that the 20+ year old F828 takes 7-8 seconds to write files to the memory card every time you hit that shutter button! If you find this unbearable you can use JPEG mode instead. Remember that every time you either turn the camera off, or if the camera goes to sleep automatically, the IR-cut filter is going to flip back into place, so remember to keep your magnet handy when you're out shooting.
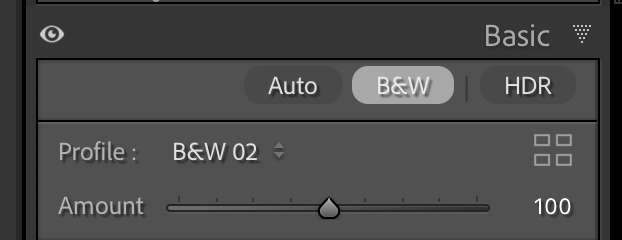 Like I said, processing b&w photograph shot with an R72 filter, is fortunately reasonably simple. I shot these photographs in RAW mode and then imported them into Lightroom and let it apply it's usual default Adobe Color profile. At first this produced very disappointing purple images! So I just went to the basic panel in Lightroom's develop module, set B&W mode, and then stated browsing thought all the available profiles. I found applying the B&W 02 profile got me surprisingly close to the look I was after. It was then just a case of using all the usual sliders just as I would with any normal photographs to refine the look of the photograph.
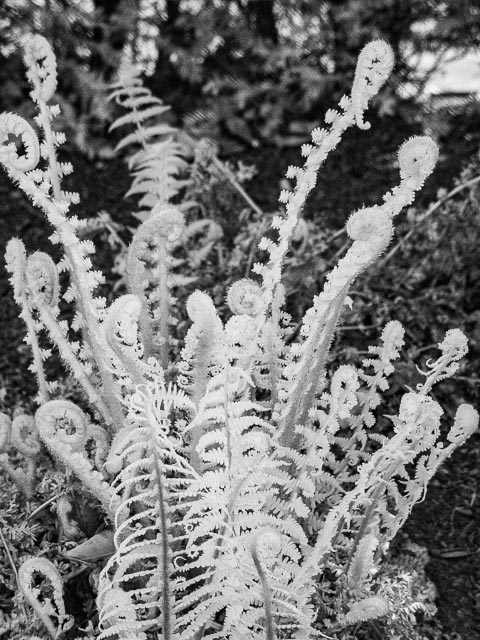
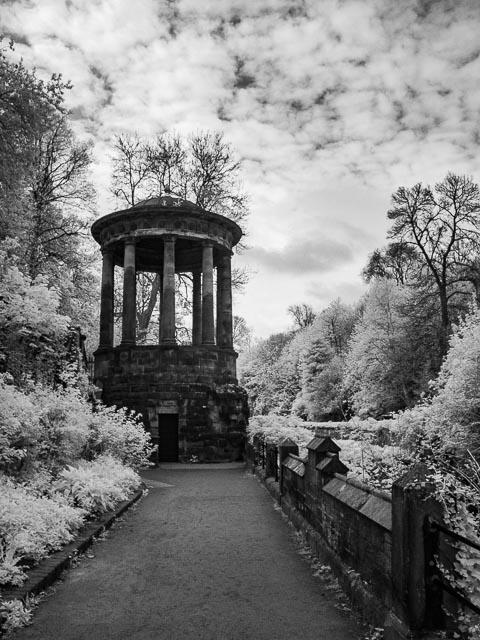
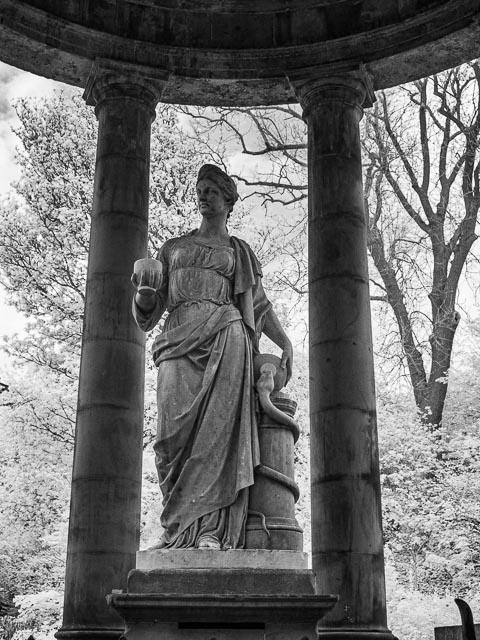
R72 gallery


Using an IR chrome filter
There are many other types of infrared filter to try! Some are designed to produce 'false colour' images, but generally these require sophisticated post-processing techniques that involving swapping colour channels that I haven't got around to matering just yet (though I plan to at some point in the future!). But one type of filter designed to produce colour images that doesn't require any special processing is the 'IR Chrome' filter. This type of filter was invented by a company called Kolari Vision, but Kolari Vision filters can be very expensive. So I decided to by an off-brand filter from an eBay seller called gatolt. But this still wasn't cheap at £56 for a 58mm filter needed for the Sony F828! An IR Chrome filter is designed to reproduce the effect of an infrared film made by Kodak from 1942 to 2009 called Aerochrome. This film was originally intended for military use as real vegetation glows bright orange, while fake plastic vegetation (which is sometimes used to camouflage military installations) remain dark. But it was soon adapted by photographer for artistic purposes.
Using this filter on the Sony F828 is generally very easy, just mount it on your camera after applying the magnet hack and you can immediately see the effect in the electronic viewfinder. However, my F828 had problems focusing reliably with this filter mounted. In general focusing on closer subjects was much better than on subjects further away. But if you can keep the aperture to f/4, or even better f/5.6, then the greater depth of field this creates eant pretty much everything was in focus. Just bear in mind that you want to keep ISO as close as possible to 64 and anything higher than 100 ISO will mean lots of not-very-attractive grain.
Fortunately the post-processing with an IR Chrome filter is easy. I just imported the photos into Lightroom and let it apply it's normal Adobe Color profile. It's then just a case of playing with the white balance sliders (usually moving the 'Temp' slider towards yellow and the 'Tint' slider towards green) until you get the colours you're looking for. You can then just play with the other sliders in the 'Basic' pannel just as you would with any other photograph until you get the result you're looking for.
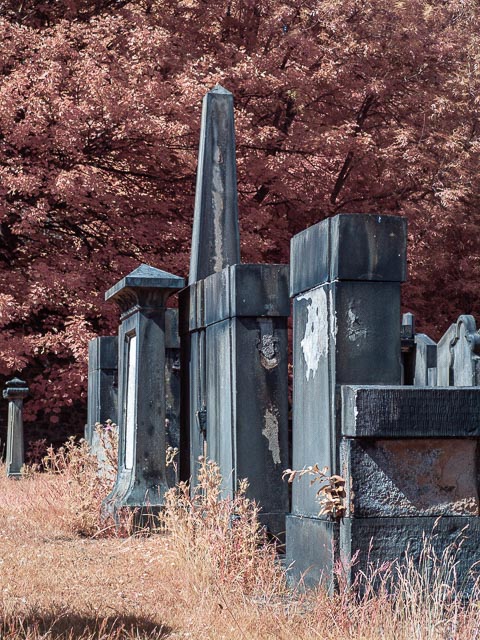
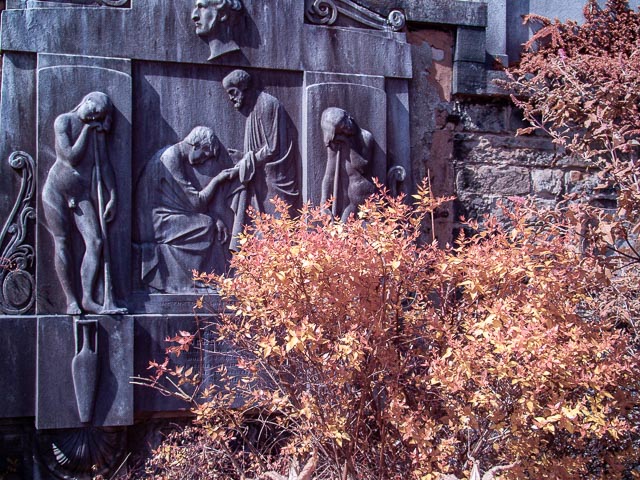
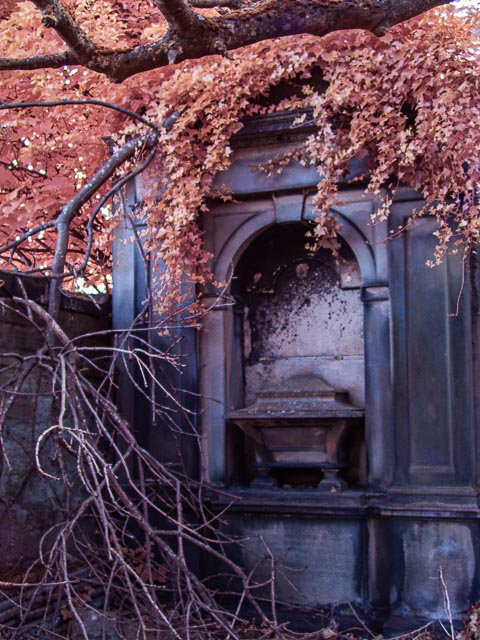
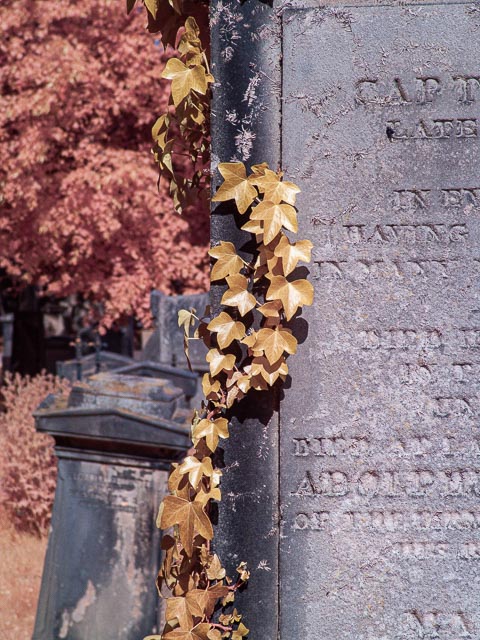
IR Chrome gallery
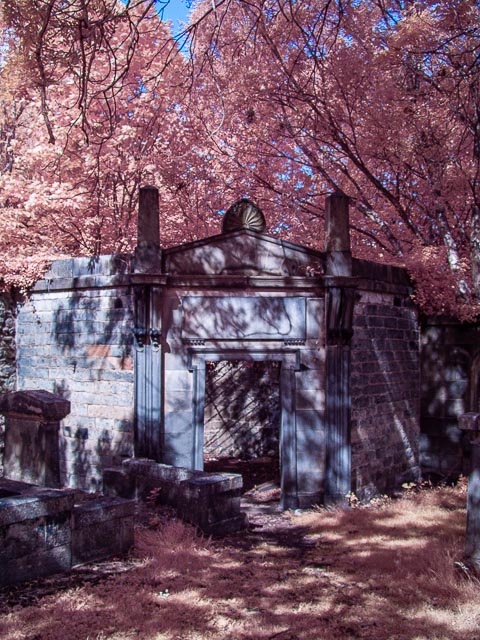
Most of these photographs were taken in a graveyard in Edinburgh called New Calton Burial Ground on a bright sunny day, and these really aren't the weather conditions you want for melancholy cemetery photographs! But the IR Chrome filter gave these photographs a weird, slightly creepy and disturbing, quality that was just right for graveyard photography.


Conclusion
Using the magnet hack on a Sony F828 camera is probably the cheapest way to experiment with reasonably high quality infrared photography. I spent about £85 on the camera, £18 on the filter (though in retrospect I do now wish I had bought a more durable one!) and £5 on the magnets for a total spend of £108. When you're used to the standard R72 filter you can move onto to other types of infrared filter. Plus you've not permanently changed you're camera, so you can go back to normal photography with your F828 at any time. Of course you have to remember you're using a 20+ year old camera so you have to be realistic when it comes to image quality. There is no doubt that a mirrorless camera with large sensor that has been permanently convert to IR will reward you with far higher quality results. But the F828 with the magnet hack will allow you to find your feet with infrared photography while you decide whether you want to splash a few hundred £s on such a camera.